Building a Retaining Wall with Concrete and Rock: A DIY Guide
May 6, 2025
Few exterior features offer the long-term impact of a retaining wall constructed with concrete and rock. Beyond its ability to stabilize soil, it introduces form, function, and definition to the landscape. Concrete delivers the structural integrity necessary for enduring performance. Rock introduces a natural finish that enhances visual appeal without compromising strength. The combination strikes a balance between engineered reliability and intentional design, reinforcing the landscape while contributing to its overall character.
Start with a Solid Plan
Effective results start with deliberate planning. Wall height, slope conditions, and soil composition each influence both design and longevity. For walls over four feet, reviewing local building requirements and involving a structural professional adds confidence to the build. Projects under that threshold often fall within reach of a well-prepared DIY effort, especially when supported by the right materials and a clear layout.
Accurate measurements lay the groundwork in this phase. Marking the footprint with stakes and string provides a reliable guide, while a level and tape measure ensure consistency throughout. Drainage should be addressed from the beginning. Directing water flow properly reduces pressure behind the wall and supports long-term structural integrity.
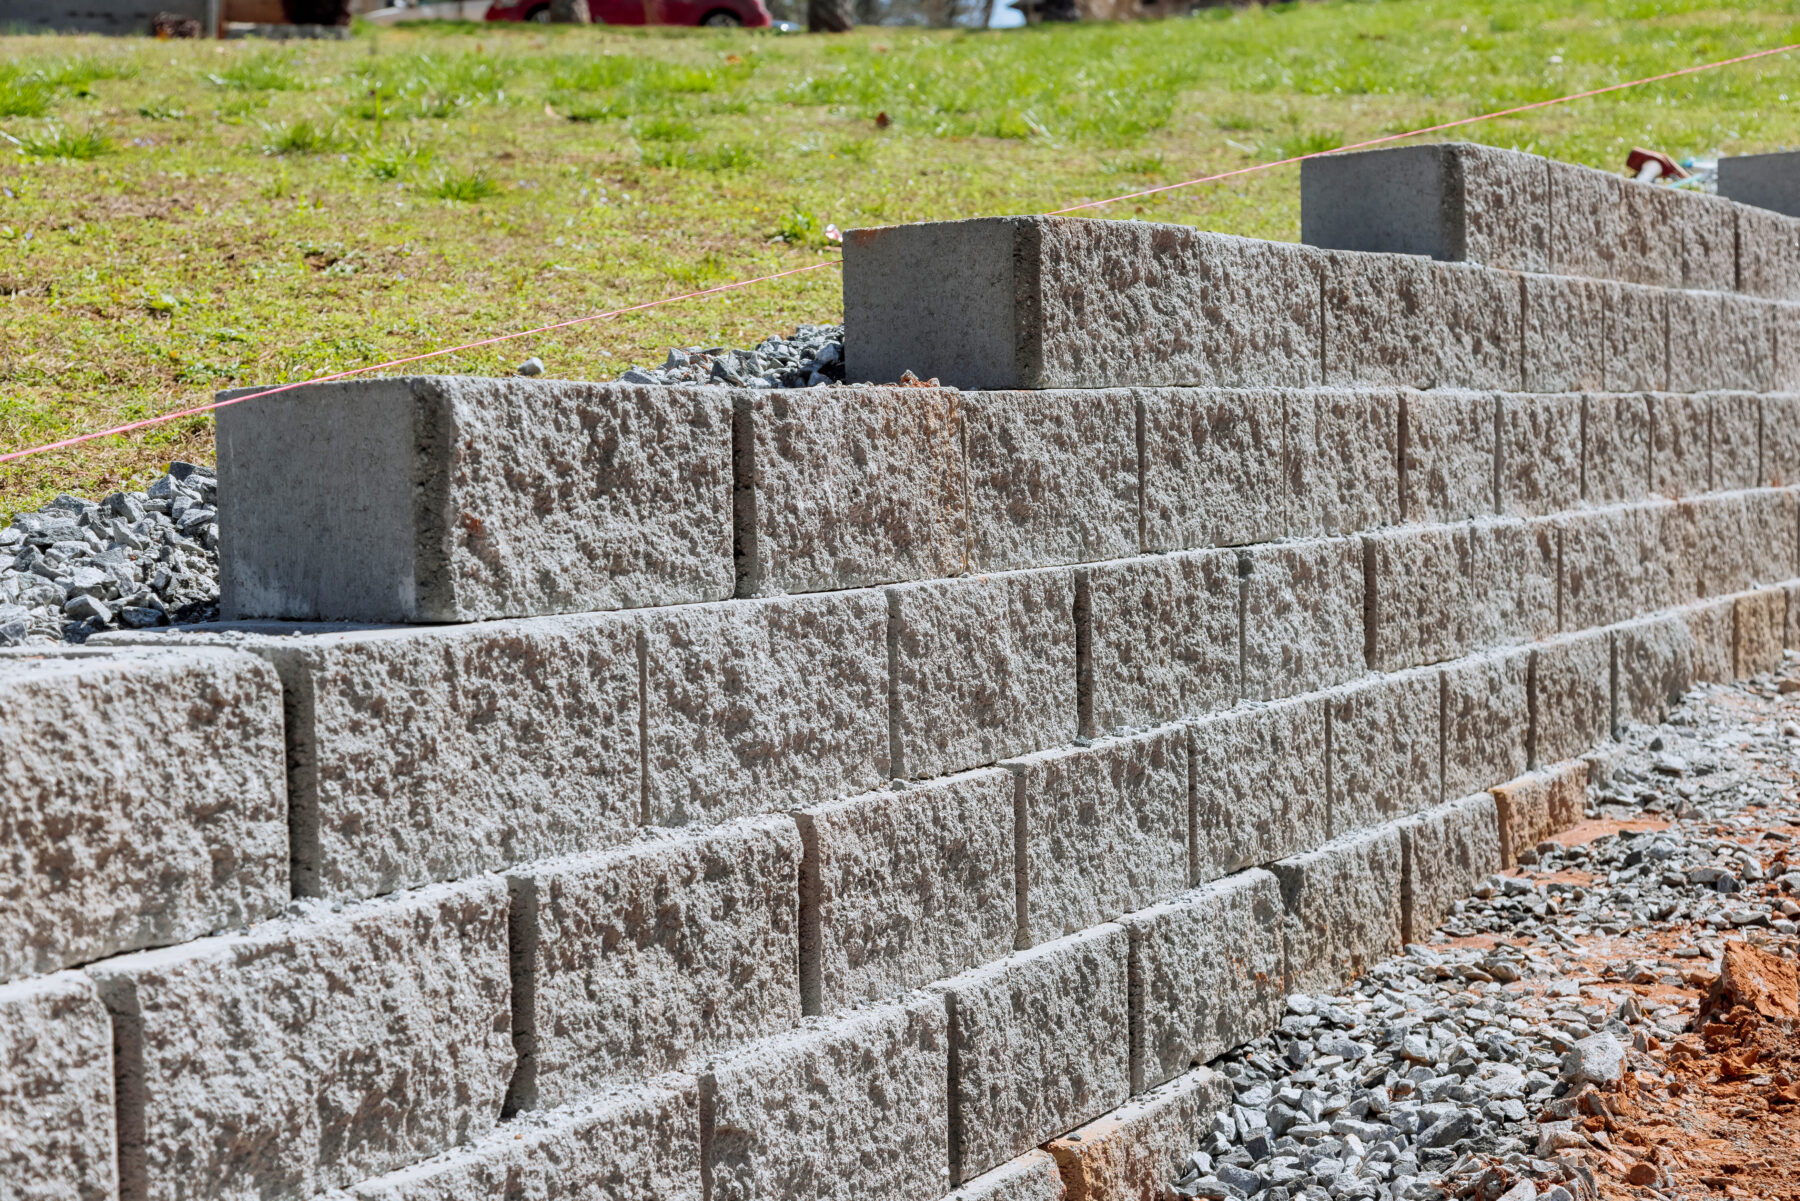
Excavation and the Base Matter More Than They Get Credit For
No structure stands tall without a stable foundation, and retaining walls are no exception. Begin by digging a trench that’s slightly wider than the wall itself and deep enough to support both the base material and the first course of block or concrete. A good rule of thumb is to bury the first row about a tenth of the wall’s height.
Once the trench is set, it’s time for a crushed stone base. This provides the kind of compact, level surface concrete blocks or poured concrete need. Compacting this base with a tamper is essential. Skip this, and the wall settles unevenly later.
Choosing Between Concrete Blocks and Poured Concrete
Both materials accomplish the objective, but the choice depends on style, experience, and the demand of the build.
Concrete blocks, especially those made for retaining walls, lock together cleanly and offer a more modular approach. Each unit is manageable by hand and includes a built-in lip or locking feature to maintain alignment. This makes the process more forgiving, particularly for first-timers.
Poured concrete, on the other hand, creates a seamless, monolithic structure. It’s stronger in the long run and handles pressure better on sloped terrain. But it requires formwork, precise mixing, and more planning upfront. If rock will be incorporated for aesthetics, poured concrete affords a clean backdrop for that contrast.
Integrating Rock for Strength and Style
Rock introduces a layer of dimension and visual contrast that great as an additive feature. Depending on the design intent, it can function as a decorative facing on concrete block systems or be embedded directly into poured concrete using formwork. In either case, placement matters. Strategic positioning, which factors in spacing, weight distribution, and overall alignment, ensures both structural reliability and visual cohesion.
Mortar may be incorporated to reinforce the build, though it’s not always necessary with interlocking or dry-stack configurations. When used, small batch mixing and clean application help maintain a refined finish and protect the stone’s appearance.
Irregular stone contributes to a more organic, natural aesthetic, while cut or uniform rock creates consistency and pattern. Regardless of the stylistic direction, the integration of rock with concrete adds depth, texture, and permanence to the finished wall.
Drainage Is Non-Negotiable
Effective drainage plays a central role in the long-term performance of any retaining wall. Managing water flow behind the structure helps prevent unnecessary pressure buildup and supports structural consistency over time.
With simple components like gravel and a perforated pipe at the base, it’s possible to add critical functionality. Together, they create a path for water to be directed away from the wall, as opposed to pooling up at its base. The addition of filter fabric between soil and gravel keeps the system clean, reducing the chance of sediment intrusion over time. It’s a behind-the-scenes detail that reinforces structural integrity and extends the life of the wall without complicating the build.
Finish Strong with Backfill and Landscaping
Backfilling happens in layers, so soil should be added gradually, being tamped down to avoid settling, and graded away from the wall to keep surface water from pooling. Once the wall is secure and backfilled, the surrounding area opens up for creative landscaping. Low-maintenance ground cover, ornamental grasses, or stacked rock beds complement the new wall and give it a finished look. Moreover, lighting and edging will add polish and visibility.
Securing the right blend of concrete, gravel, and rock is a critical first step. Working with reliable suppliers helps maintain project timelines and ensures consistency in material quality. When paired with the proper tools and a clear execution plan, well-sourced materials contribute directly to a more streamlined build and a longer-lasting result.